
Who doesn’t love fail2ban? I know I do. If you look at logs and see the constant and acceleration of the server attacks on the internet from the massive resources across the world doing nothing but trying to takeover your servers for crypto currency mining, ransomware, or to help aid criminal phishing attacks, you’re probably using fail2ban in some form.
If you are using fail2ban to help fight the incessant attacks from the around the world, you are surely using the built-in filter sets for Apache, Postfix, Dovecot, and other know services. This is all well and good and you are adding automated blocks as attacking servers come at you and your key services and maybe tweaking some of the filters for your specific needs and thresholds. I’ve been running that too, but this post is not all that. This is about going a little further than that but building off the ufw and fail2ban you have working now. I did this for my personal setup as there is more room for being excessive on blocking systems than would would be acceptable in a corporate setting.
I wanted something that would take any traffic to specific tcp or udp ports and immediately deny from that source. For many ports, there is never a reason to ever his these ports unless it is a portscan or some system trying to find a way in and I have typically just disabled the ports or blocked them inbound via the outer firewall.
Here is what i did and I am happy with it and wanted to share it for others if they are interested in this more aggressive use of fail2ban.
- I had an operational and effective setup of fail2ban working on my server. I had a few jails for postfix, apache, dovecot, sshd, etc. with something like ~30k deny entries across the different jails.
- A firewall that was stopping common external ports not in use but are prime targets on portscans. I am okay with enabling those and setting-up a trap for ufw to snag these offenders.
- A desire to try and proactively block attacking servers that might be doing initial discoveries around common ports before going after web apps, etc.
Step 1: Pick a trigger port you want to use. I decided on port “11111” this is going to help define the trigger for the killswitch pattern in the UFW log and what the fail2ban filter below will reference. UDP and TCP ports that will trigger the killswitch will be redirected to 11111 on the UFW/fail2ban server.
Step 2: Issue a deny on the server for the trigger port. In my example, my setup is
$ sudo ufw deny 11111Step 3: Add port forward rules on your firewall/gateway NAT for the tcp and udp ports that will be scanned and that you want to trigger the fail2ban killswitch when an attacker is portscanning you. Screenshot of a version of mine. You should use ports you are not using across NAT but would be prime targets. You can start with just a port or two and keep adding as you get comfy with the situation.

Step 4: Verify you are now getting traffic on the server at port 11111. You can do this just by checking the /var/log/ufw.log and grepping for DPT=11111 via a cat or more or tail.

If you are getting hits on the ufw.log at your kill port, you can now trigger fail2ban to use that to jail inbound connections.
Step 5: Add a new filter that will snag the traffic and trigger the blocks on UFW. There are numerous different ways to get the hits you want on the log via regex but I’m fine with using:
echo '[Definition]
failregex = SRC=<HOST>.* DPT=11111
ignoreregex =' | sudo tee /etc/fail2ban/filter.d/killswitch.conf
and this will generate a new filter definition in /etc/fail2ban/filter.d/ for the killswitch.conf pattern. Swap the DPT port for whatever trigger port you choose to use.
Step 6: Add the new killswitch jail to fail2ban. Confirm the filter pattern is going to get some hits via the fail2ban-regex test. If you are getting hits on that, then we’re ready to add the jail. Add the new jail entry to your jail.local file in /etc/fail2ban/jail.local (recommended config vs editing the jail.conf that could be overwritten on updates.)
Here is my killswitch jail entry in /etc/fail2ban/jail.local
[killswitch]
enabled = true
filter = killswitch
logpath = /var/log/ufw.log
action = ufw
maxretry = 1
This entry is pointing to the filter created in step 4 above and I did a maxretry of 1, but you may want to increase that just to be safe in not blocking legitimate hosts. But, if you are worried about that, you probably should not be trying this. 🙂
Step 7: Watch the blocks roll in!
After flipping this on and restarting fail2ban to enable the new jail “killswitch” the attacks and blocks came in pretty quickly. You can see the activity in /var/log/fail2ban.log like this:
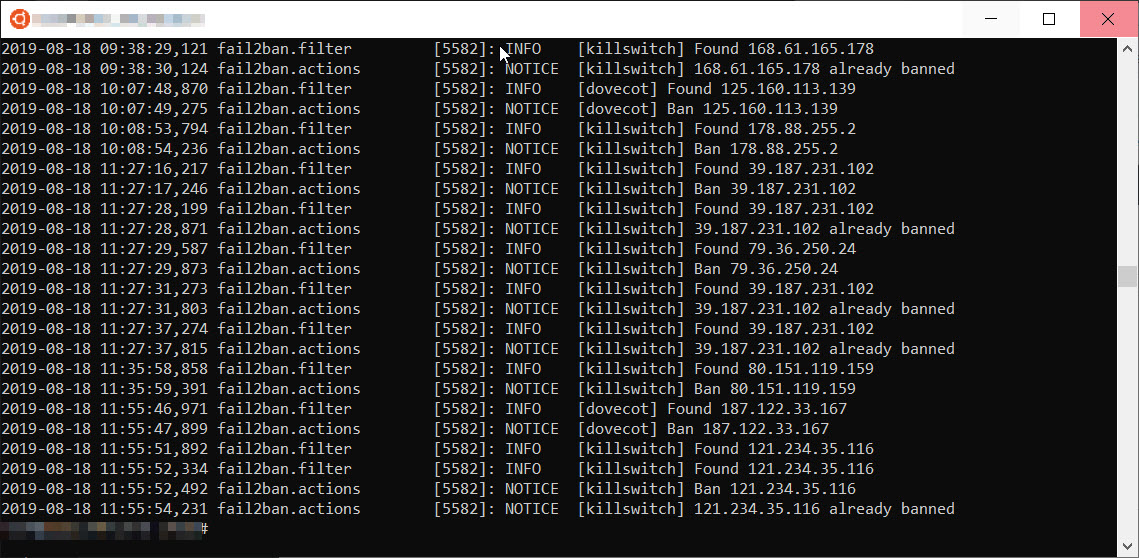
Within a few hours, I was already up to over 100+ entries I’m blocking and hopefully impeding access to additional attacks on truly active services later.
[…] snippet of the logs you see a few of the new filters/jails taking hits along with the super-handy killswitch filter I built last year that has been […]
Great idea, bit like a honey pot.
I assume the ports you forwarded are not needed?
Correct. These are ports I wouldn’t have left open but also know port scanners hit doing level 1 scans in order to gather targets for bruteforcing later. This inhibits them from that secondary act at least from the source address of the scanner hosts.
Over a year plus in on this and it’s been amazing. Before a recent rebuild of my own server, I was up to something crazy like 70k UFW rules.